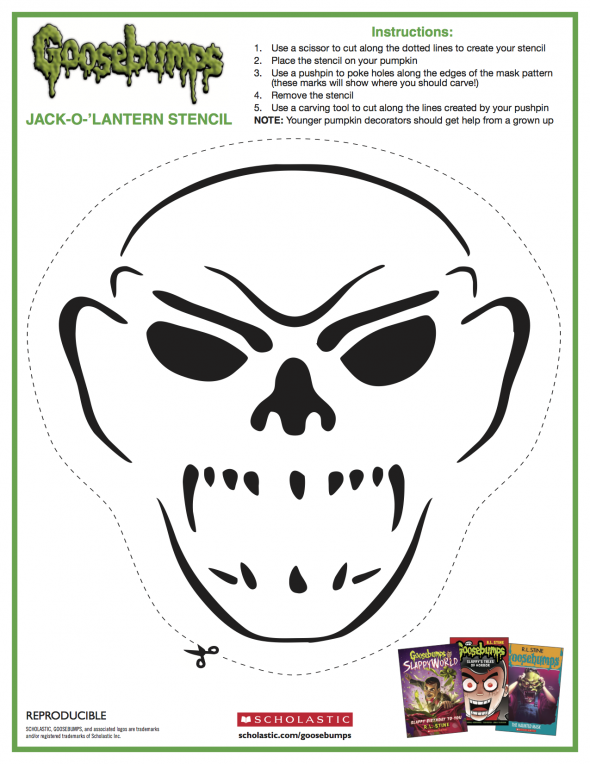
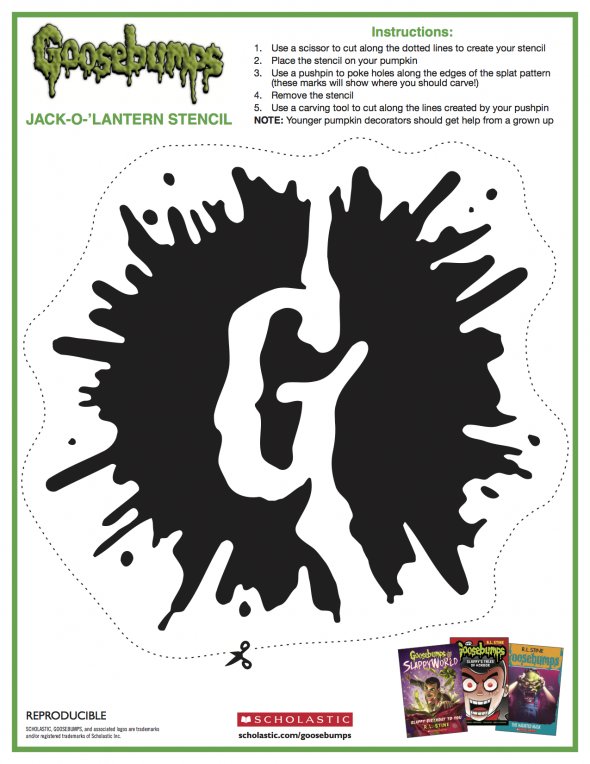
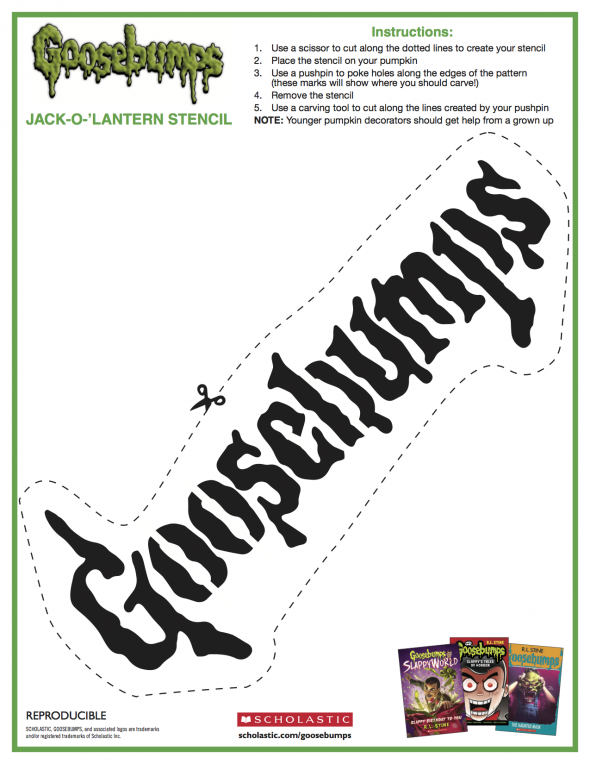
Are you trying to scare your neighbors so bad, they get goosebumps this year? Step up your spooky pumpkin decorating game with these fun DIY stencils! Print them out and follow the instructions below to use them for either carving or painting.
Instructions for carving:
1. Use a scissor to cut along the dotted lines to create your stencil
2. Place the stencil on your pumpkin
3. Use a pushpin to poke holes along the edges of the pattern (These marks will show you where you should carve!)
4. Remove the stencil
5. Use a carving tool to cut along the line created by your pushpin
NOTE: Younger pumpkin decorators should get help from a grownup
Instructions for painting:
1. Use a scissor to cut along the dotted lines
2. Cut out or around the interior black portions
3. Place the stencil on the pumpkin and use tape or a pushpin to hold in place
4. Use paint or spray paint to fill in the hollowed out sections
5. Remove stencil and let dry!
Stencils below:


Bonus mask:


